Set Up an Axis Network Camera

Sharing and Organizations

Axis is a manufacturer of security cameras. These instructions are intended as a general guide for remote access. These instructions are based on operations with the AXIS P1447-LE IP camera running on firmware 10.9.4 using the Remote.It device package for Axis v4.14.1. If you are using a different firmware version or a different device, the actual contents and messages displayed may differ from those described. These instructions can also be used to upgrade the version of Remote.It previously installed

You will need:

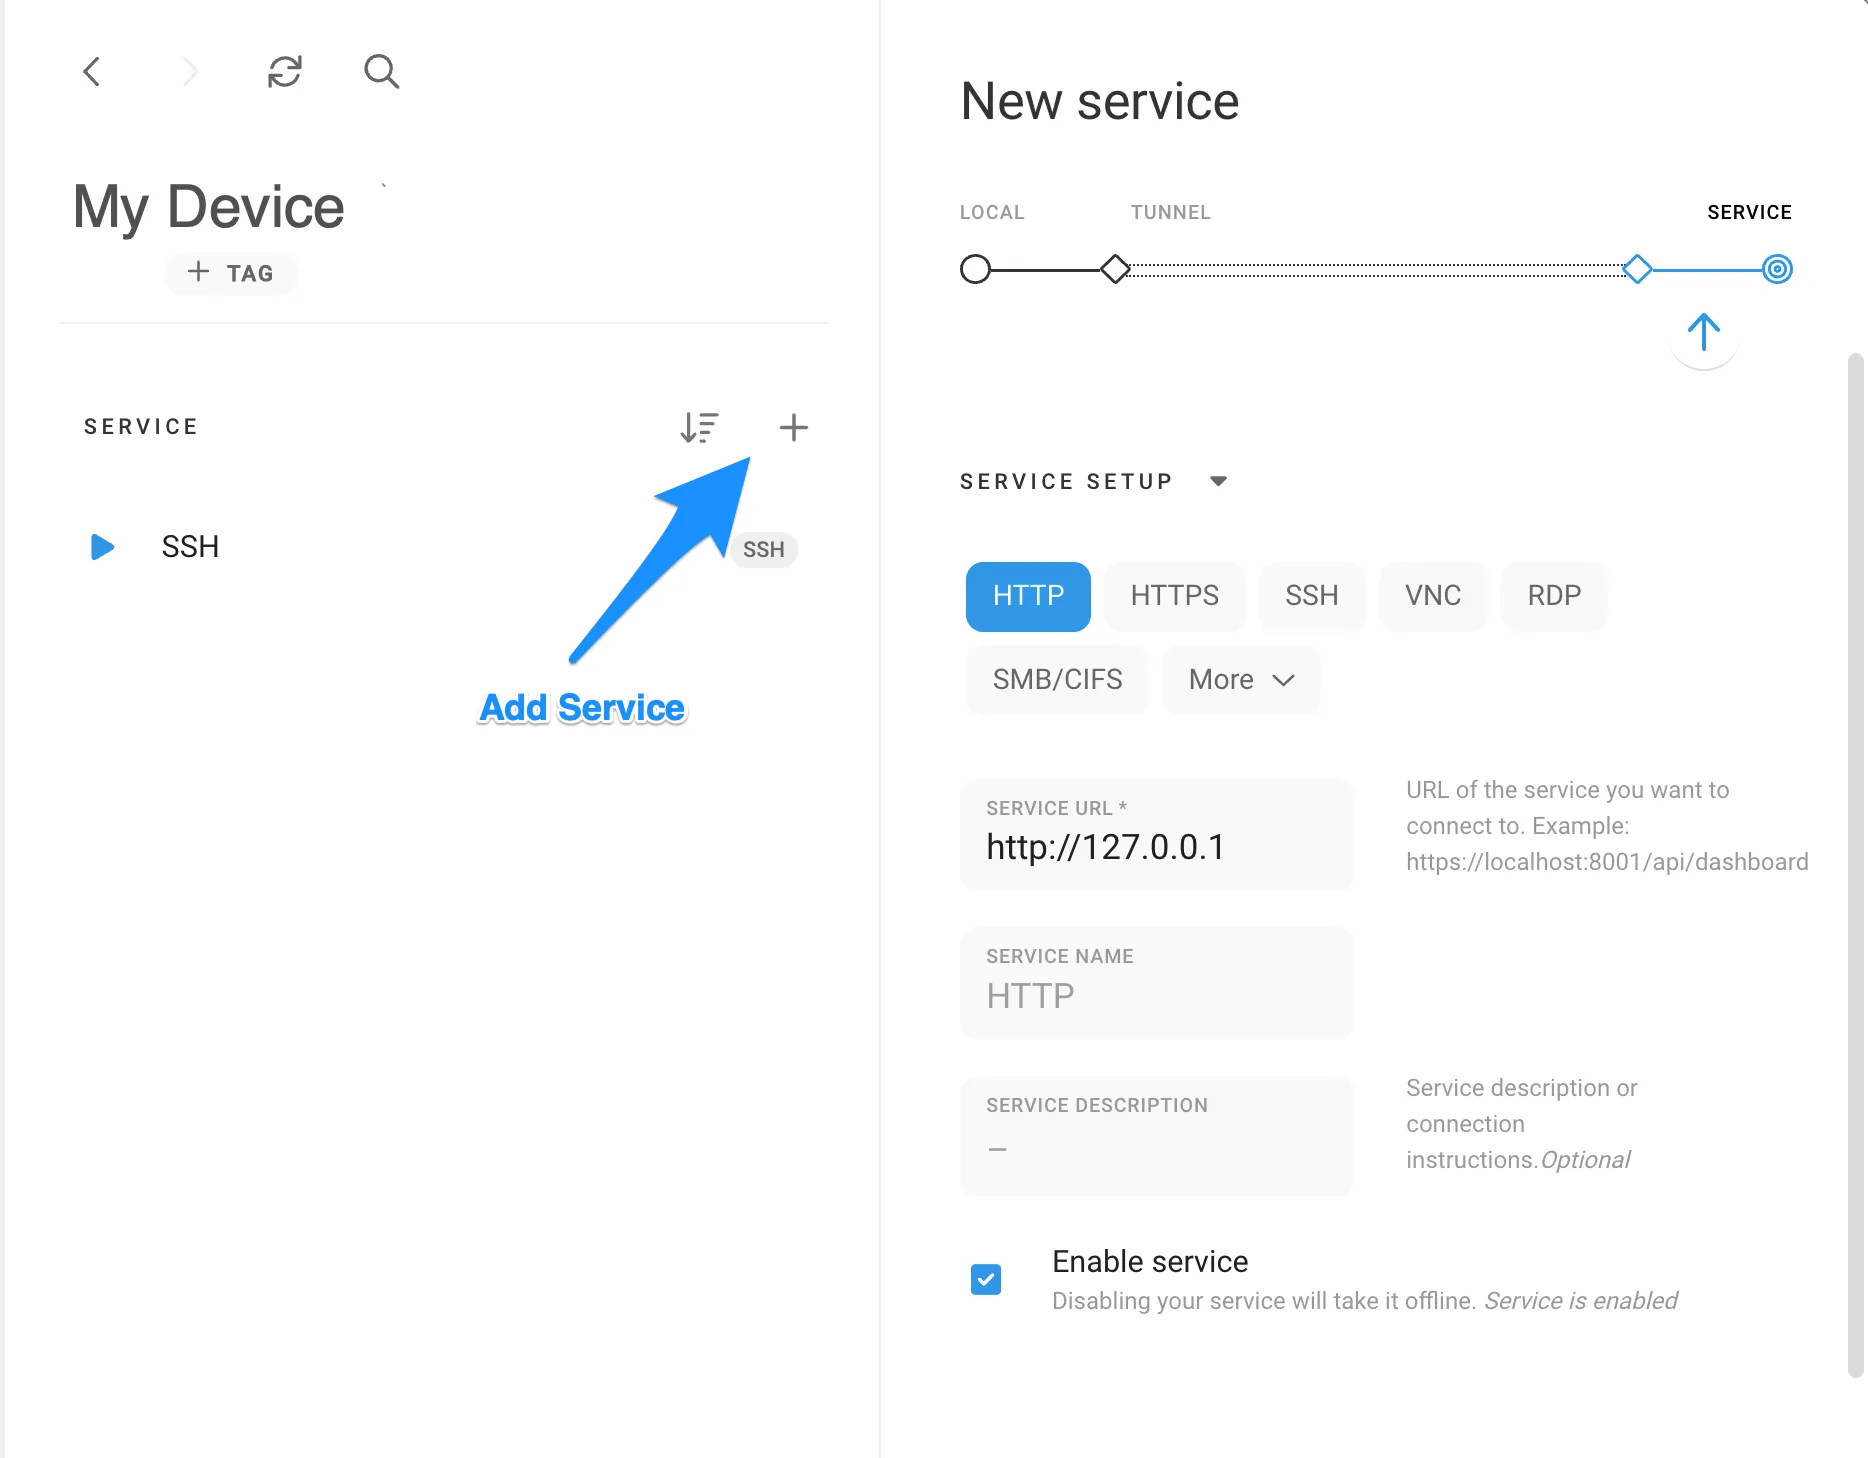
1. Download the Remote.It Device Package for Your Axis product.

You can check the camera architecture in "System">"Maintenance">"Reports">"View the server report"

Axis
Device-Package
arm64
Remote.It Download icon
Download
Remote.It Documentation icon
Documentation
Axis
Device-Package
arm
Remote.It Download icon
Download
Remote.It Documentation icon
Documentation
Axis
Device-Package
mips
Remote.It Download icon
Download
Remote.It Documentation icon
Documentation
Axis
arm64
CPU
-
Version
v5.1.4
Date
March 4, 2024
MD5
fc0d151f333eae66d2c4a122537427da
Axis
arm
CPU
v7
Version
v5.1.4
Date
March 4, 2024
MD5
76d548d617b8ed1bb398cbaf642e821e
Axis
mips
CPU
-
Version
v5.1.4
Date
March 4, 2024
MD5
93178880aafeadb6a1ce050e1e1af8d9

2. Access the Web UI of your Axis product and switch to the Administrator role.

Before installing Remote.It, please make sure that the Date/Time is set correctly otherwise Remote.It will not work properly. Please refer to the Axis documentation if this needs updating.

Axis UI

3. Select the "Apps" Menu and click on "Add app" (see image below)
Axis add app

4. Select or drag the downloaded eap file into the dialog box. Then click "Install"
Axis install app

5. Toggle "Start" to on in the remoteit box and click "Open" when the button appears
Axis enable app

6. Copy the claim code from the newly opened browser window

Note: The device name shown is as it will appear in the Remote.It system (You can change this later).

Axis claim code

7. Complete your registration. Open https://app.remote.it or the Remote.It desktop app. Click the "+" (Add Device) button and enter/paste your claim code. (see image below)

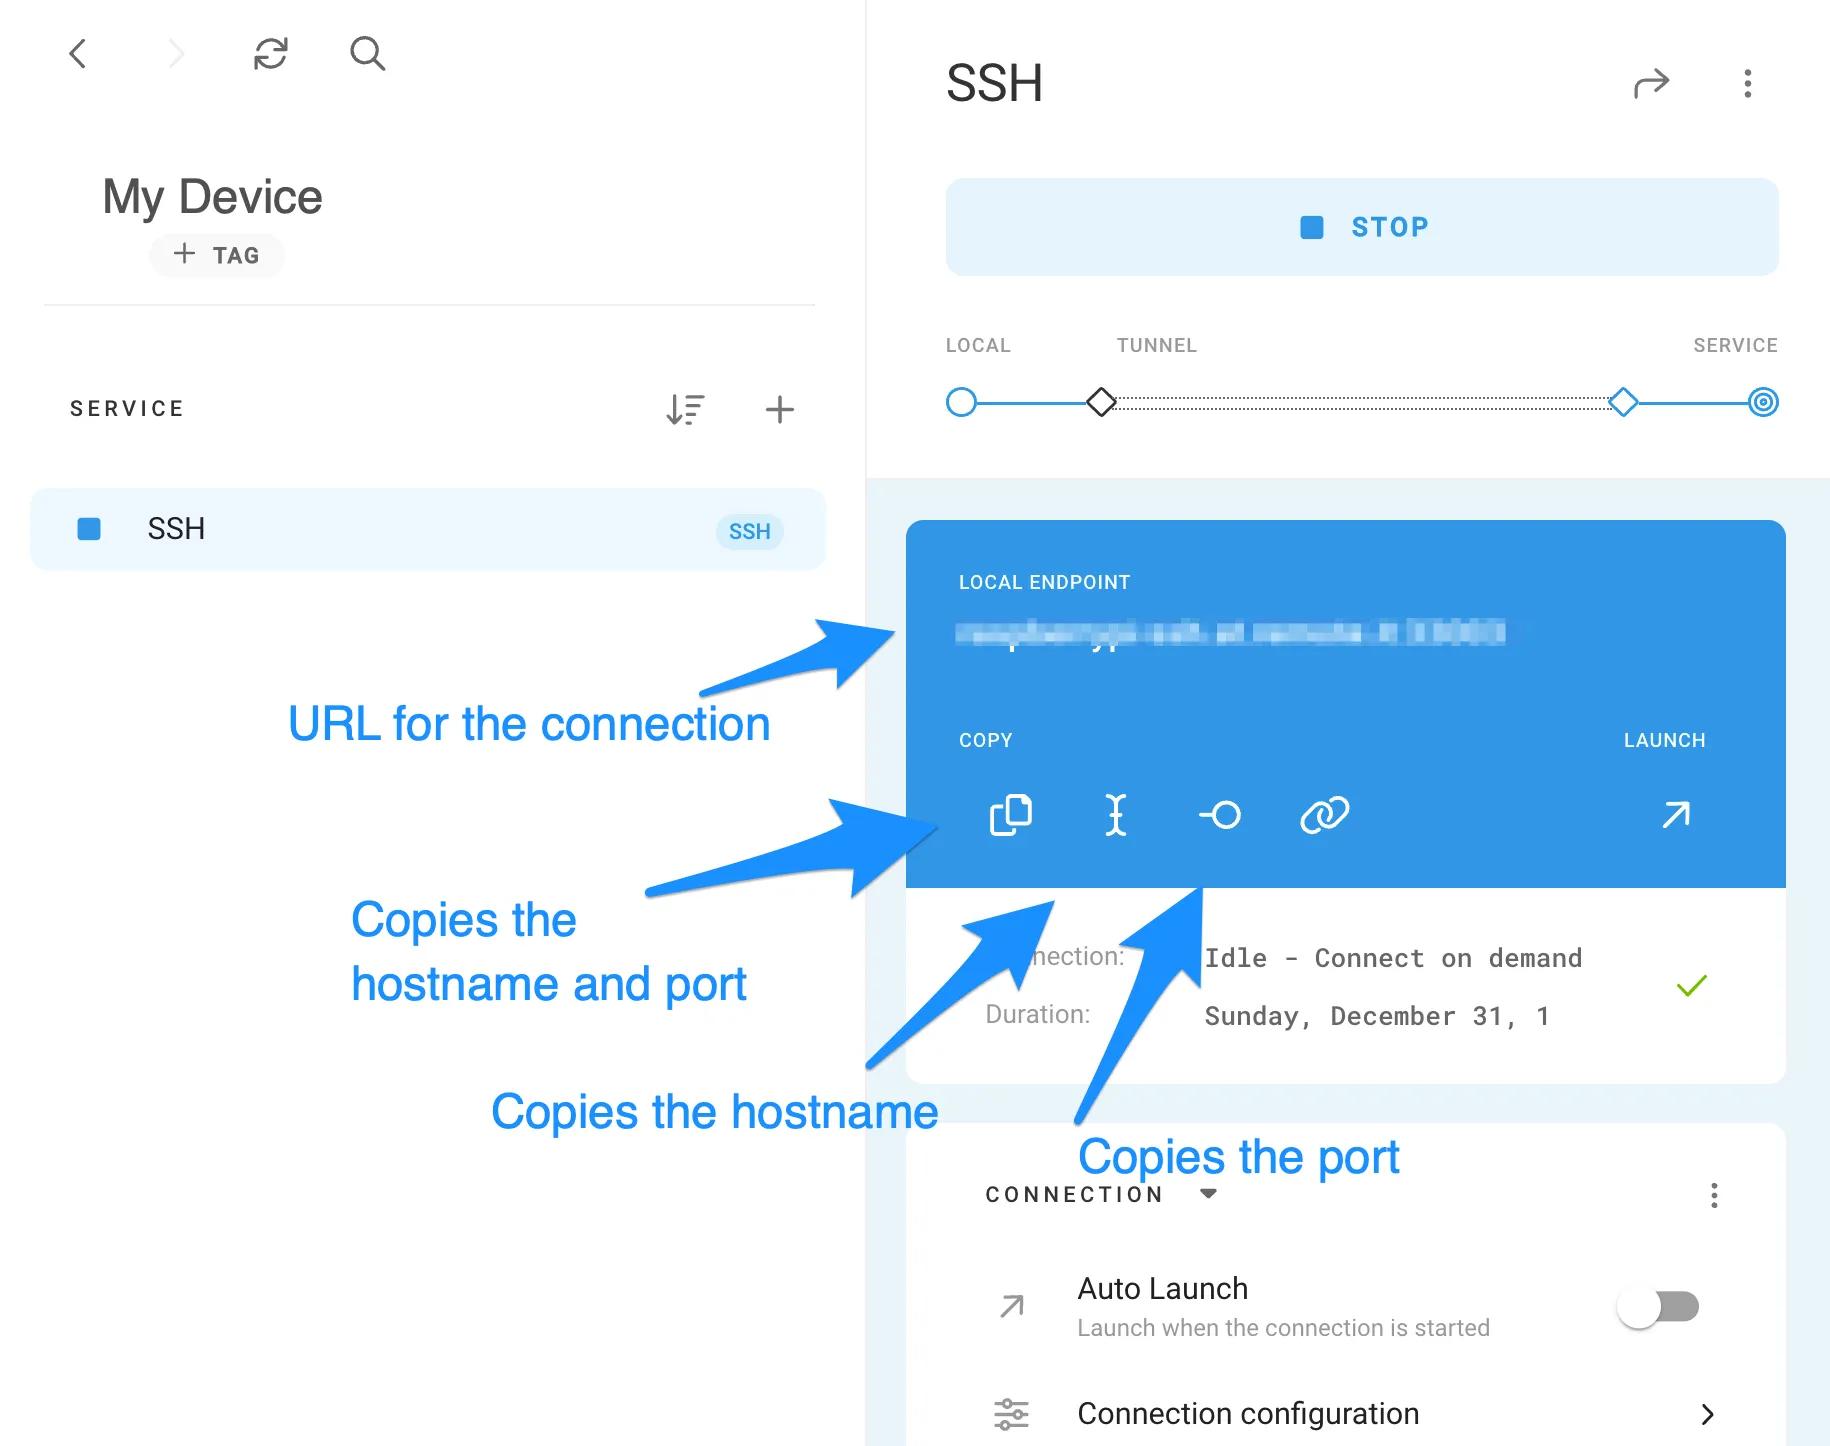
You will see a notice that it was successfully registered and you will be taken to the device page.

Axis registation

8. Set up services
If you are not automatically on the Axis device detail, click on your Axis device. Click "+" (Add Service) on the device detail.
We will first add access to the Web UI by selecting HTTP. You may supply a name such as Web UI and leave all of the rest of the defaults and click save.

Follow the same procedure to add SSH service and RTSP service. (For services which are not available in the selector, you can use the TCP selection and specify the name and port, in this case 554)

Axis add service
This is image shows adding SSH. You add HTTP and RTSP similarly.


9. Connect
Select the service you would like to create a Remote.It connection and click "Connect". You can now use this connection information in the application such as terminal, VNC viewer or a browser. When you are done with the connection, click "Stop Connection"

If you see that the service is offline, you will need to restart the device once to enable the added services. (This is a known issue in older versions of the software. You can restart the device in the Web UI under the "Maintenance" menu selection.

Axis connection URL hostname port

Ready to do more?

Remote.It has a lot more to offer from allowing you to share your devices to friends and colleagues, advanced connection configurations, online/offline notifications, manufacturing support and more. Learn about them here.