
We believe in securely connecting everything by enabling users to build private networks within the internet that only they can see. We provide zero trust IT/OT networking as a service.
Language
English
These instructions are intended as a guide for remote access. As a general rule, if your Dragino is hosting a service which is accessible via a LAN address and port, then Remote.It can be used for access from outside the LAN without port forwarding on a public IP address OR your Dragino can be used as a jump host to access other LAN devices such as a network printer.
This guide describes the installation and basic usage of remote.it for Dragino devices and is based on operations with the Dragino LG308 LoRa Gateway running on firmwarelgw-5.4.164031589. If you are using a different firmware version or a different device, the actual contents and messages displayed may differ from those described in this guide.
Remote.It is supported on the following Dragino devices:
You will need:
Let's Get Started:
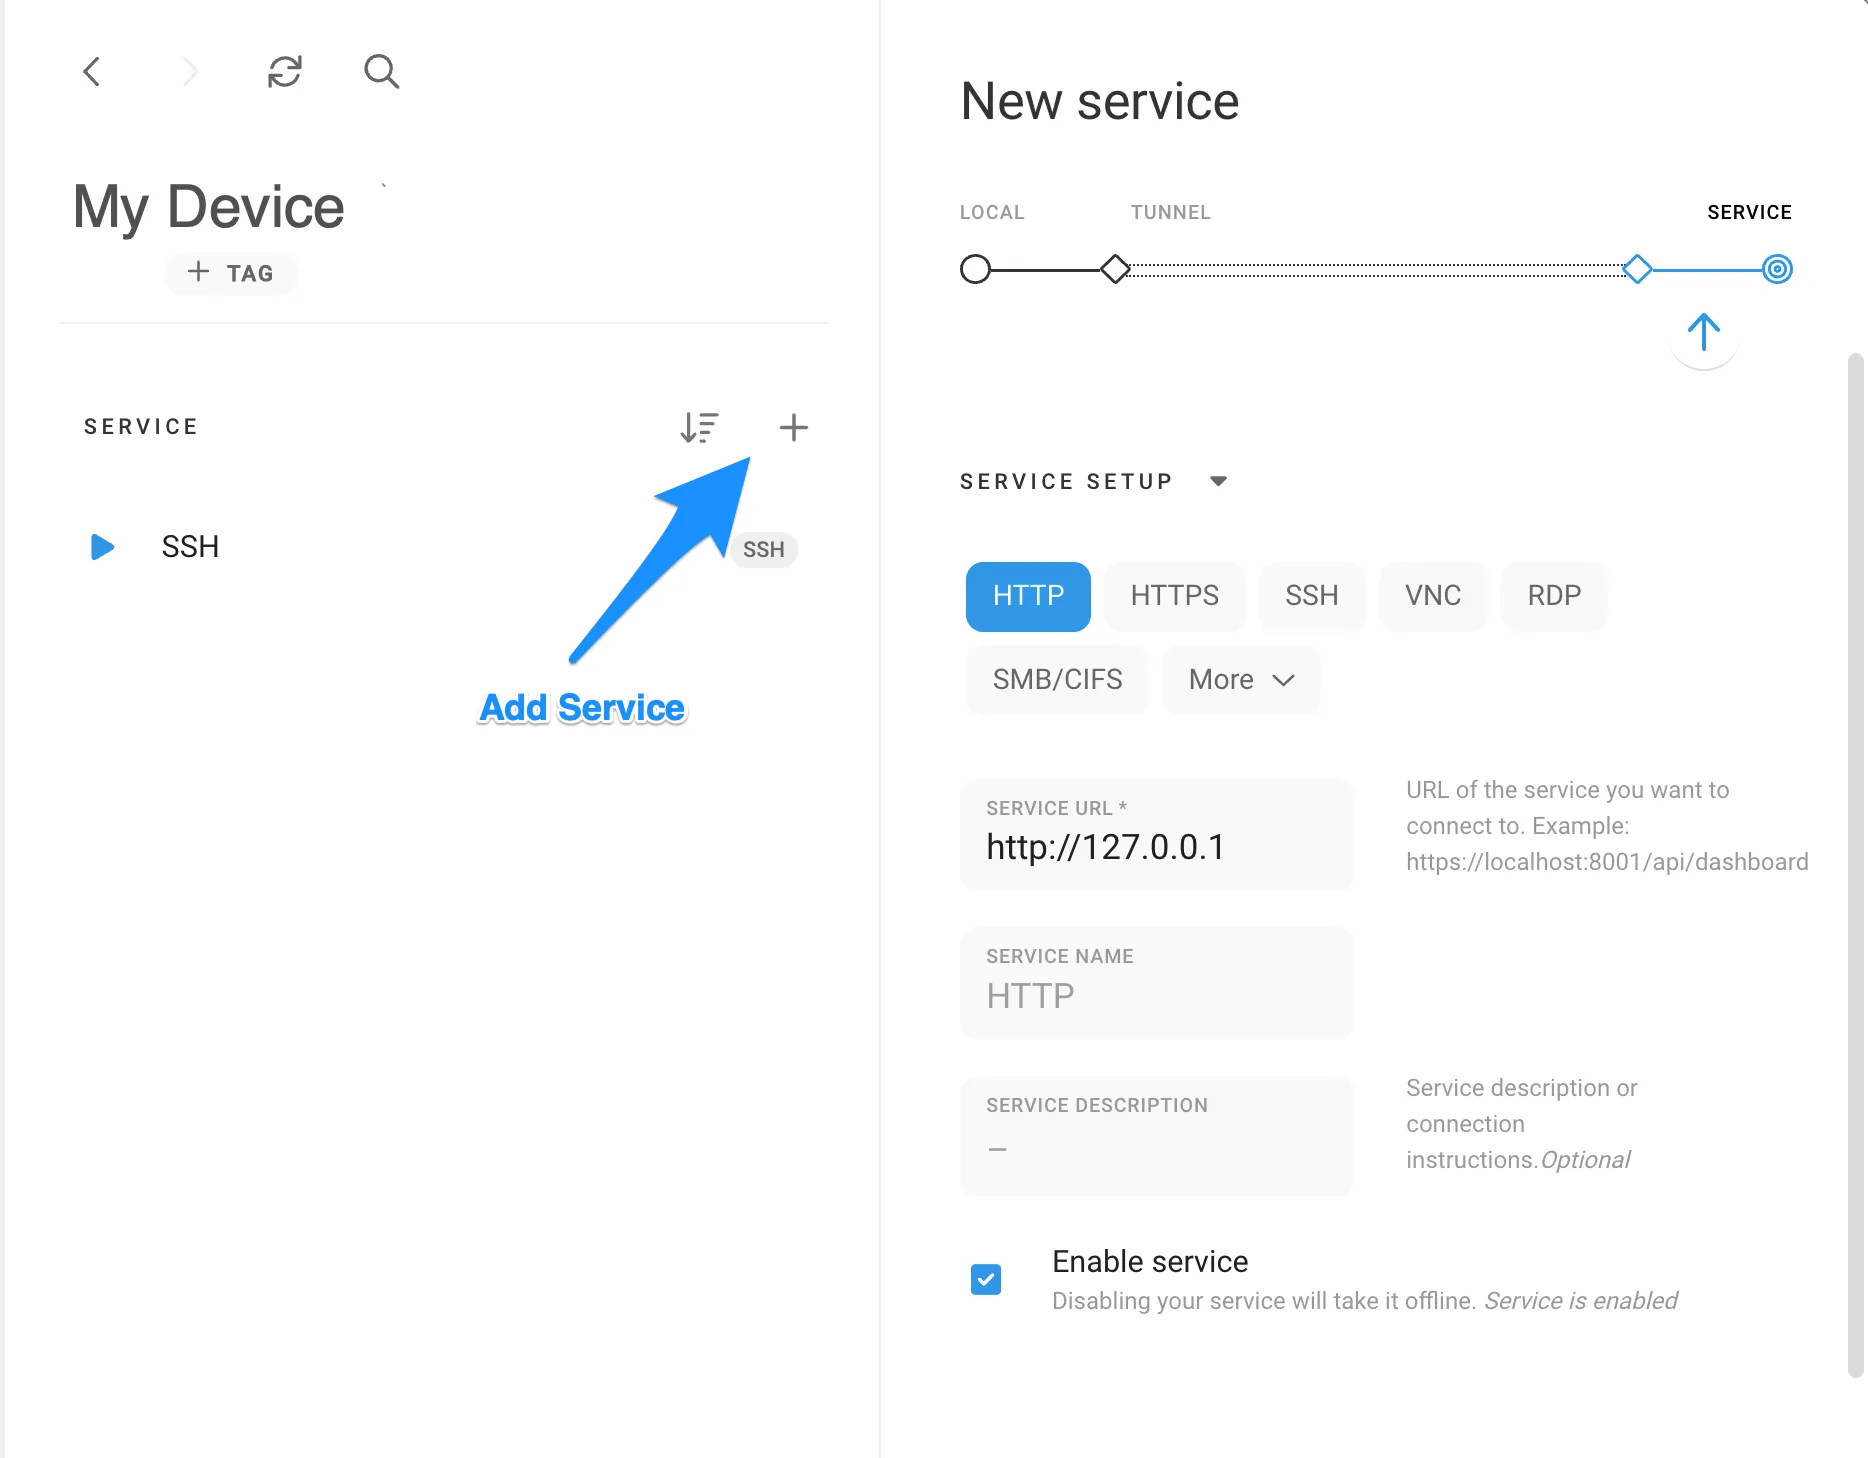
1. Access the web UI of a Dragino device using a web browser on the local network. (When required to login, login as root.) Navigate to System>Remote.It (see image below)

2. Click the "Install" button on the Remote.it page (see image below). When finished, the Status section will update to show installation complete. You will need your Remote.It license key for this next step.

3. Sign in to Remote.It https://app.remote.it and get your license key. Click on the avatar, then "Account" and then "Licensing" (See image below)

4. Enter/paste the license key into the Dragino gateway page Bulk ID Code/License Key field and Save. The status message will update from "Installation complete" to "Remoteit is installed". (see image below)

5. Click "Register". Both status messages will update when complete (see image below)

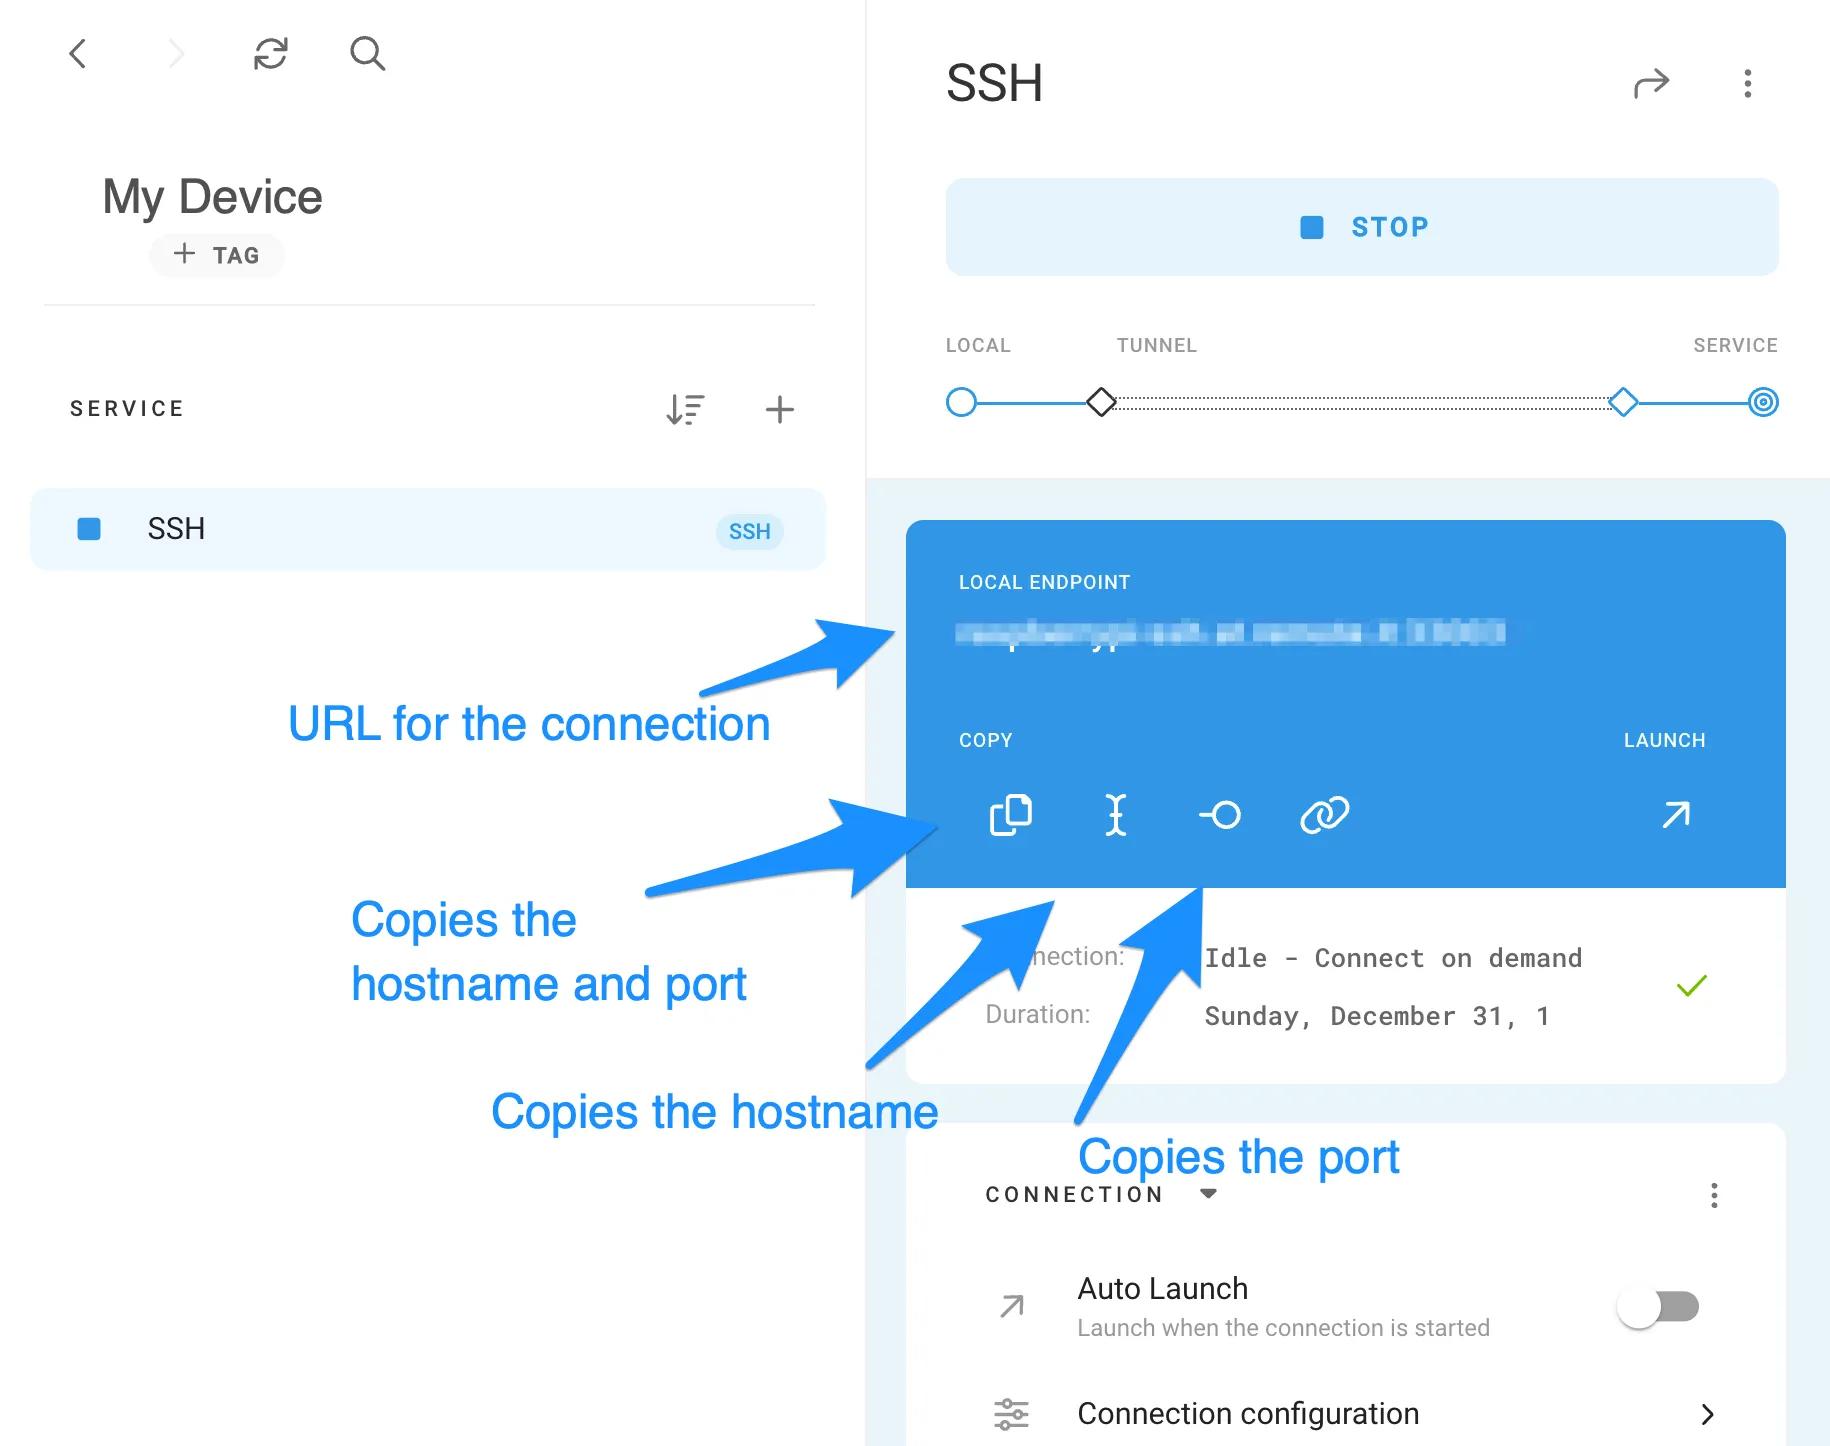
6. Go back to the Remote.It web portal and click devices. You may have to click the "refresh" icon to update the view (see image).
Note: The device name in Remote.It is the hostname. You can see the hostname at the bottom of the Dragino gateway page.

Plus, Remote.It has a lot more to offer from allowing you to share your devices to friends and colleagues, advanced connection configurations, online/offline notifications, manufacturing support and more. Learn about them here.