Set Up AWS Cloud

Sharing and Organizations

AWS is a cloud service provider that offers hosting of many services such as databases, API. and web servers. These instructions are intended as a general guide for remote access. Use an EC2 instance as a Jump server to other services running in the same VPC, such as a database or Kubernetes cluster. Or, add Remote.It access to any services which are running on an existing EC2 instance. Do all of this without any inbound rules in the AWS security groups, thereby blocking all ingress traffic and eliminating open ports to the internet. For target services such as databases, storage and web applications, you can simply add authorized users via email address in the Remote.It application. This works well with your remote workers and contractors by eliminating the need for IP allow lists to be maintained. It also works on CGNAT connections where your team may be connected via a cellular or satellite carrier where IP addresses are not known or are transient. For more information on Organizations, click here.

You will need:

  • A Remote.It account. Sign up here: https://app.remote.it
  • AWS console access to the account where access is needed

Use our YouTube video OR follow the instructions below


Let's get started:

1. Retrieve your registration code:
Sign into the Remote.It portal and click "+" (add device) and select "AWS", copy the generated code (see image below).
This command will be used to automatically download and install Remote.It and register it to your account.
AWS add device

2. Launch your EC2 Instance

  • Log into AWS console account
  • Select the region and go the the EC2 dashboard
  • Select "Launch Instance"
  • Enter name for the instance and leave the defaults for the Application and OS images (Amazon Linux 2)
  • The instance type can be left at t2.micro (if this instance is being used as a jump host)
  • Select a key pair that you already have setup or create a new key pair
  • Deselect the checkbox for "Allow SSH traffic from" (you do not need public access with Remote.It)
  • Open "Advanced details"
  • In the "User data", field enter "#!/bin/sh" + return and your previously copied command from Remote.it
EC2 Management Console

3. Set up services

The Remote.It web portal should notify you that your AWS instance has been registered and automatically detect and set up SSH access. The name of the device will be the same as the AWS instance ID.

Example below is for a RDS service, but you can use a similar methodology for any resource. NOTE: The resource must have VPC security group assigned which allows the EC2 instance a path to the resource.

Open your AWS Console to the database instance page.
Copy the Endpoint address (internal DNS name) and note the port. (See image below)

RDS Endpoint url example

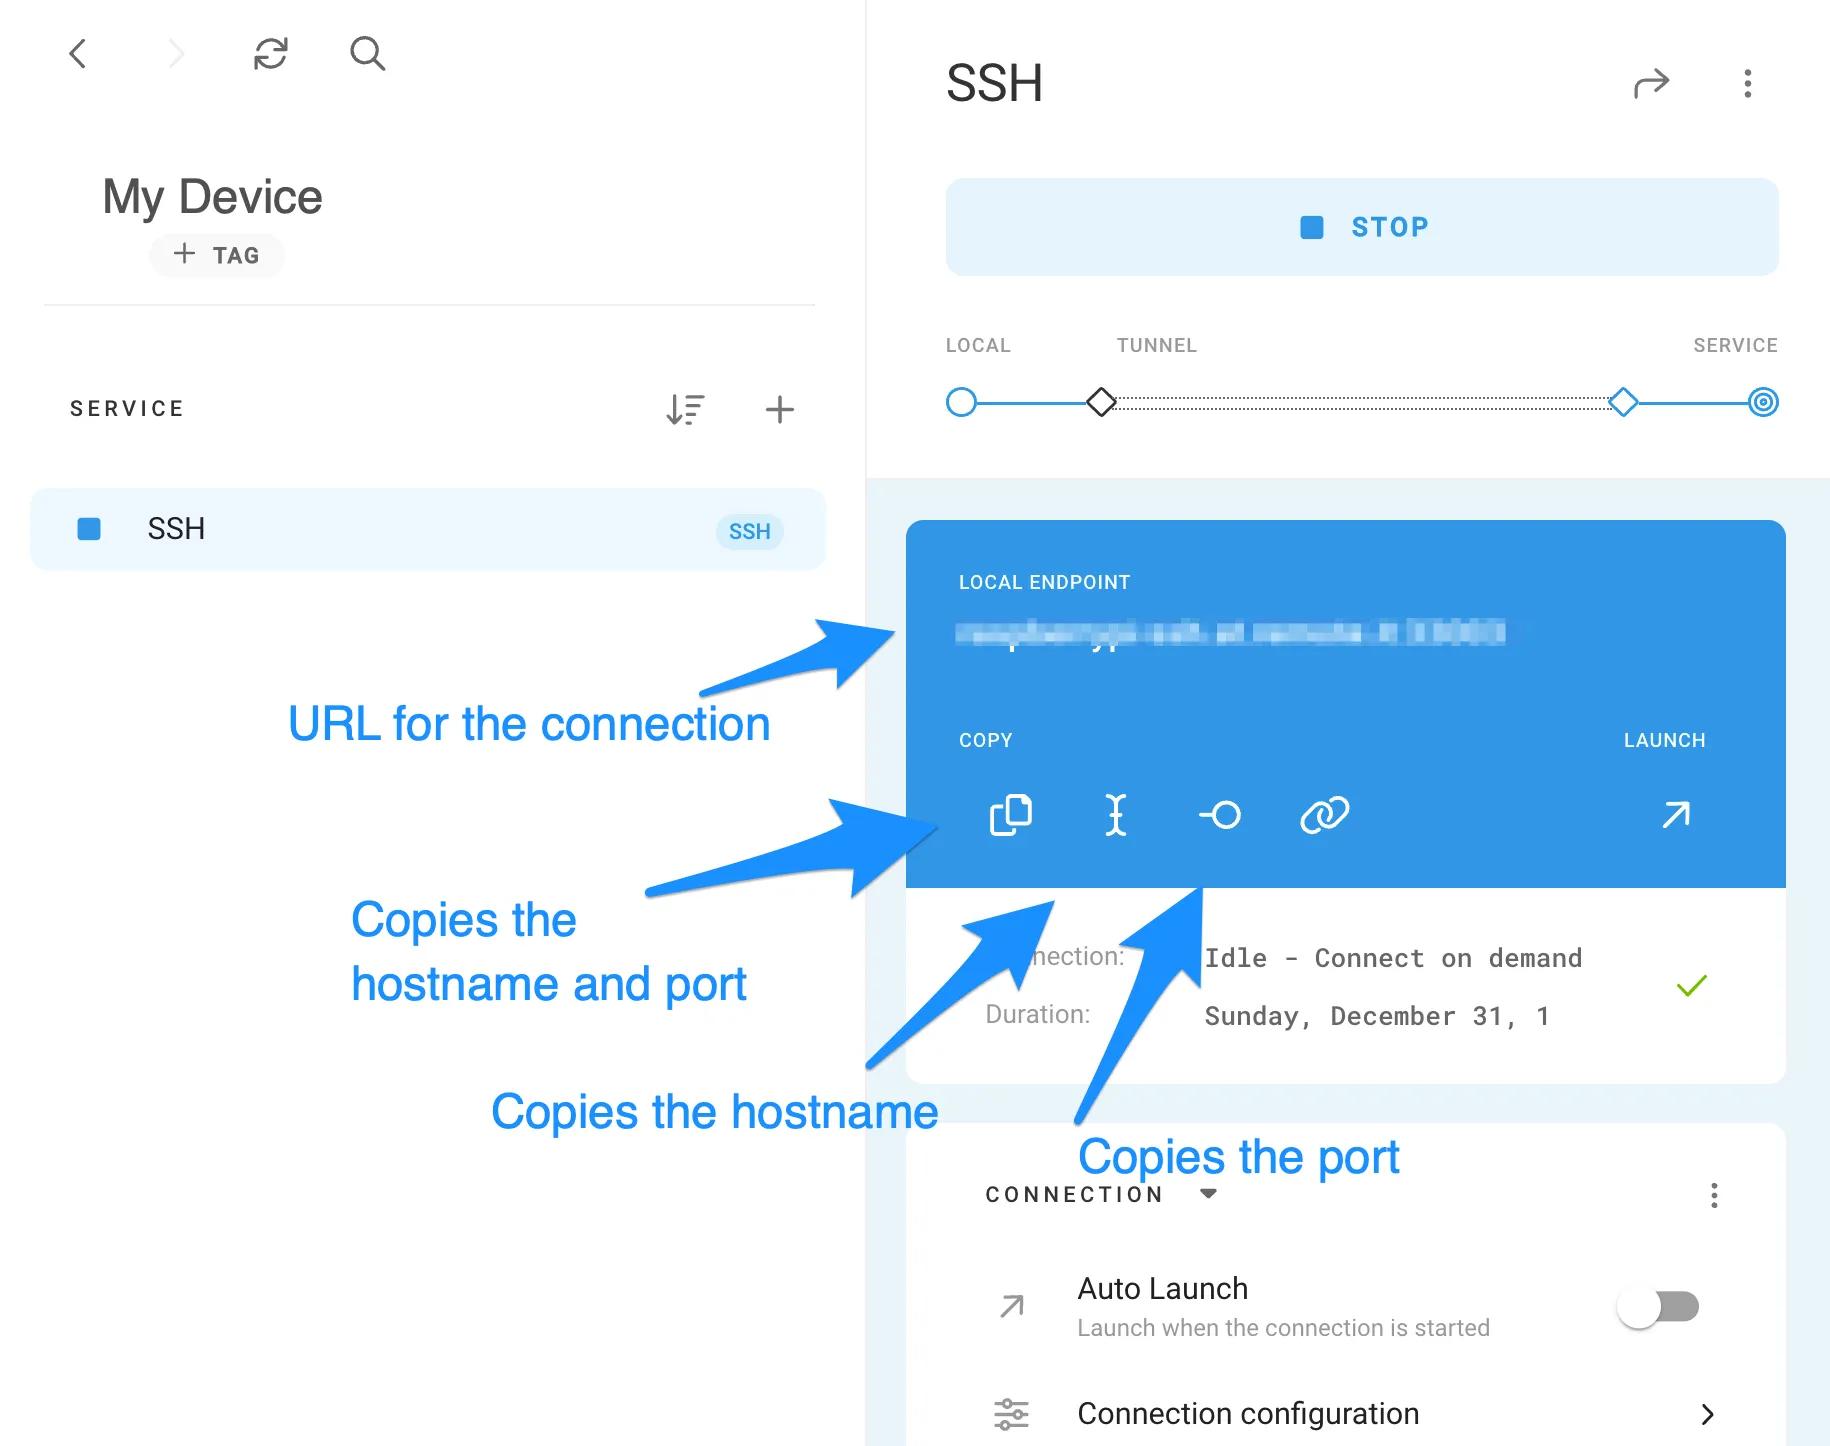
Back in the Remote.It Web page:

  1. Click "+" (Add service) on the device detail.
  2. Select the service type from the list and name the service (Many options are available, if you do not see the type you need, you can select TCP)
  3. Name your service so you can identify it in the future from the list.
  4. Verify the port which will default to the standard port for the service type. If you have changed it, update it to match what is shown in your AWS Console
  5. In the Service Host field, which is pre-populated with "127.0.0.1", paste the address you copied from the AWS console.

Repeat this process until you have setup all of the endpoints you need.

Remote.It add service detail


4. Connect
Select the service you would like to create a Remote.It connection and click "Connect". You can now use this connection address in an application such as PG Admin, MySQL Workbench, or in a conf file for a local development app. When you are done with the connection, click "Stop Connection". (It is recommended to use the Desktop app for connections on demand with a url that doesn't change for your connections in the future. Desktop is supported in Windows and Mac)

Ready to do more?

Remote.It has a lot more to offer from allowing you to share your devices to friends and colleagues, advanced connection configurations, online/offline notifications, manufacturing support and more. Learn about them here.